Frequently Asked Questions

How to Password Protect a Folder in Windows 11
Share your love
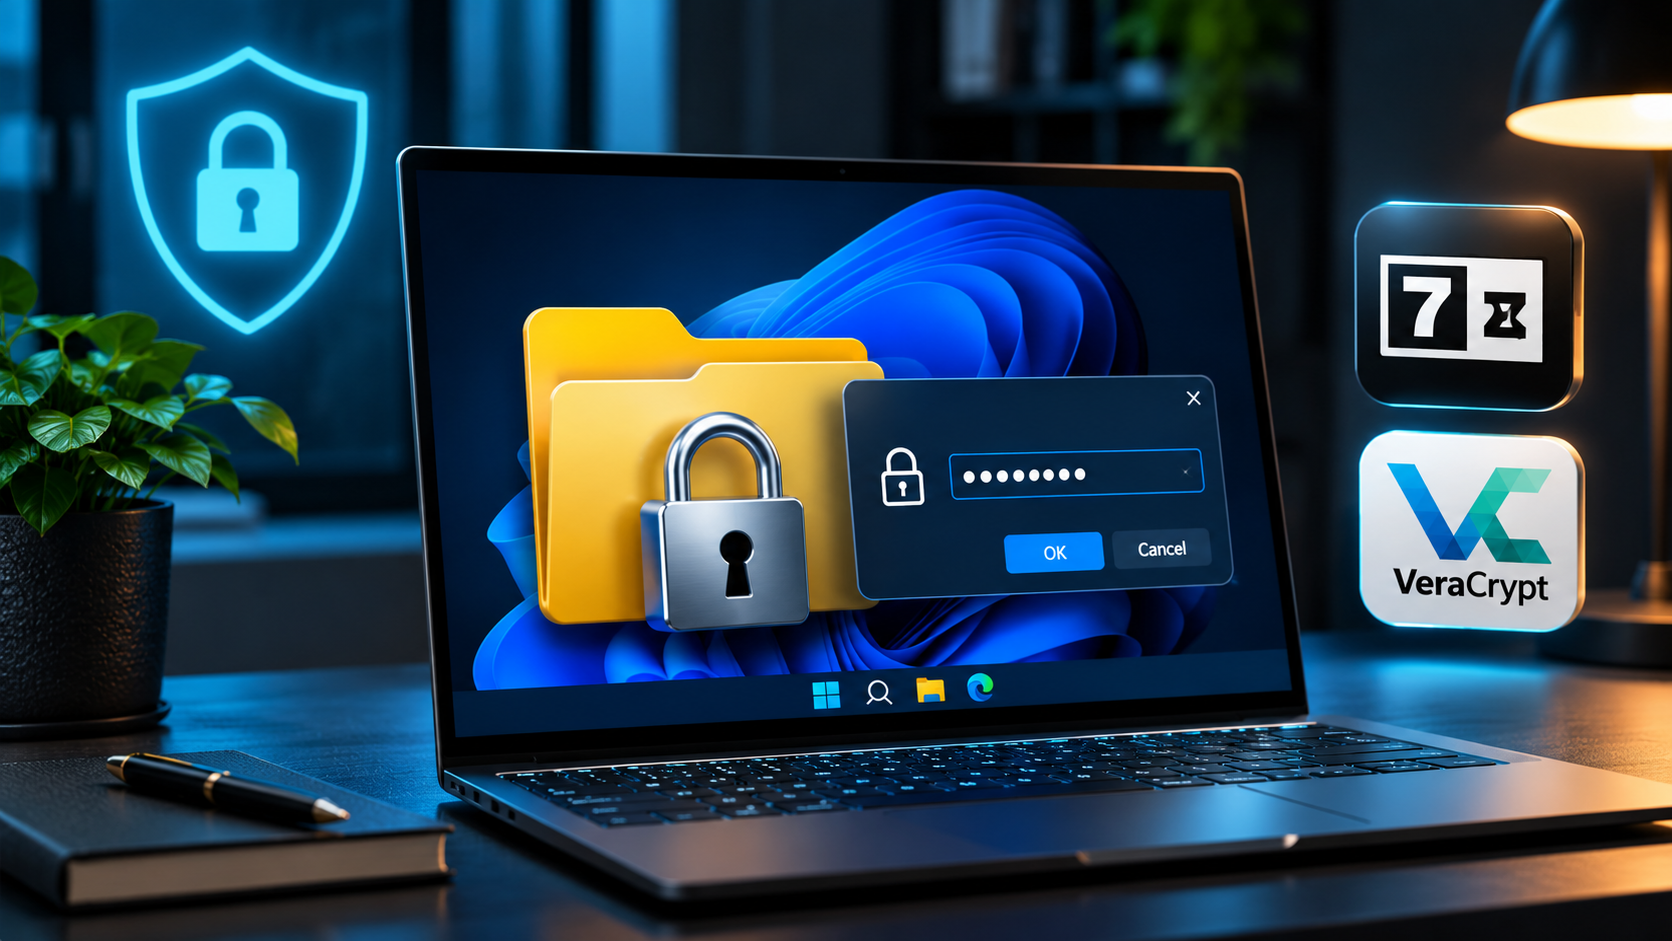
To password protect a folder in Windows 11, store its files in an encrypted 7-Zip archive or a VeraCrypt container. Windows does not provide a separate password setting for an ordinary File Explorer folder. The right choice depends on whether you want to put documents away or keep working on them regularly.
A 7z archive works well for tax records, contracts, or files you need to share securely. A VeraCrypt container gives you an encrypted drive for everyday work. Windows 11 Pro also includes EFS file encryption, but EFS uses your Windows account and encryption keys rather than an additional folder password.
Which folder protection method works on Windows 11 Home and Pro?
For a folder that requires its own password, choose 7-Zip or VeraCrypt. Both work on Windows 11 Home and Pro, so you do not need to upgrade Windows just to create a password-protected archive or container.
| Method | Separate password? | Windows edition | Best use |
|---|---|---|---|
| 7-Zip encrypted 7z archive | Yes, to unlock the archive | Home and Pro | Archiving documents and sharing a protected copy |
| VeraCrypt file container | Yes, when mounting the encrypted drive | Home and Pro | Editing private files regularly |
| Encrypting File System, or EFS | No additional folder password | Pro, Enterprise, and Education | Encrypting local files for an authorized Windows account |
| BitLocker or Device Encryption | No separate password for individual folders | BitLocker management on Pro and above; Device Encryption on eligible Home devices too | Protecting a drive if the computer or storage device is lost |
If you just want to protect a folder today, start with the 7-Zip instructions below. If you expect to edit its contents every day, go straight to VeraCrypt. Check your Windows edition under Settings > System > About if you want to use EFS.
This article is also available in German
You can also read the original German version of this guide on Windows-FAQ.de.
Diesen Artikel auf Deutsch lesenBefore you start: back up your files and choose a password
Make a separate backup before changing how important files are stored, and protect that backup too. Try the process with a few unimportant documents first. Keep the originals until you have checked that you can reopen the encrypted copy and recover its contents.
Use a long, unique password stored in a password manager. For example, choose 20 or more randomly generated characters instead of a name, a short number, or your Windows sign-in password. Encryption cannot compensate for a password that is easy to guess.
You also need enough free space for the original files and their encrypted copies. Creating an archive or container does not automatically secure the source folder. This distinction matters just as much as selecting the encryption settings.
Free Encryption Tools for Windows 11
Download 7-Zip or VeraCrypt from their official websites to protect your private files and folders. Both tools are free and open source.
7-Zip
Version 26.05Create password-protected 7z archives using AES-256 encryption. Ideal for securing documents, creating encrypted backups and sharing private files.
Platform: Windows 11 / Windows 10
Architecture: x64, ARM64, x86
License: Free and open source
Publisher: Igor Pavlov
Download 7-Zip
Architecture: x64, ARM64, x86
License: Free and open source
Publisher: Igor Pavlov
VeraCrypt
Version 1.26.29Create encrypted virtual drives and password-protected file containers. Ideal for sensitive documents that you need to access and edit regularly.
Platform: Windows 11 / Windows 10
Architecture: x64, ARM64
License: Free and open source
Publisher: VeraCrypt Project
Download VeraCrypt
Architecture: x64, ARM64
License: Free and open source
Publisher: VeraCrypt Project
How to password protect a folder with 7-Zip
7-Zip places the contents of your folder inside an encrypted archive. Use the 7z format with AES-256 and turn on file name encryption so that someone without the password cannot browse the list of documents inside.
1. Install 7-Zip and select the folder
Download the current Windows installer from the official 7-Zip download page and install it. Right-click the folder you want to protect, select Show more options if needed, then choose 7-Zip > Add to archive.
If the context menu entry is missing, open 7-Zip File Manager from Start instead. Browse to the folder, select it, and click Add. Give the new archive a name such as Private-files.7z and save it outside the source folder.
2. Choose the encryption settings
The Add to Archive window controls both compression and encryption. Check the following settings before you create the file.
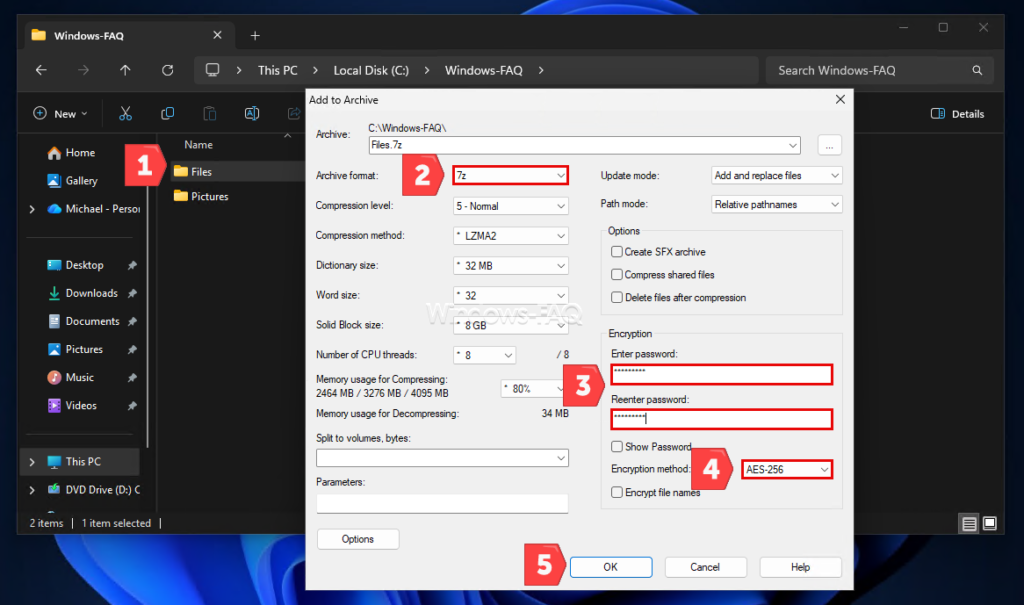
- Set Archive format to 7z.
- Under Encryption, enter your password and confirm it.
- Set Encryption method to AES-256.
- Select Encrypt file names.
- Click OK to create the encrypted archive.
Encrypt file names protects the names of the files and folders inside the archive. The outer archive name, its size, and its location remain visible. Use a neutral name if the title itself could reveal sensitive information.
Compression and encryption serve different purposes. Compression reduces file size; encryption protects the contents. You can choose Store as the compression level if you want encryption without compression, while keeping AES-256 and Encrypt file names enabled.
3. Check the password and test the contents
Close all 7-Zip windows and open the new archive again in 7-Zip. With file name encryption enabled, you should be asked for the password before the contents are displayed. Starting a fresh session avoids confusion with an archive you already unlocked.
Run the archive’s Test function, then use Extract to recover a sample of files to a protected location. Check that important documents open correctly and that the expected subfolders are present. Keep a separate backup of the encrypted archive before removing the unprotected originals.
4. Open or update the archive later
Use 7-Zip to open and extract the encrypted archive described here, even if File Explorer can open ordinary ZIP or 7z files. This keeps the workflow consistent and avoids relying on the built-in archive handler’s support for a particular encrypted format.
Extracted files are ordinary working copies outside the archive and are no longer protected by its password. Editing one of those copies does not automatically update the original archive. For frequent changes, a VeraCrypt container usually offers a more convenient workflow.
If you send an archive to someone else, check that they have software that supports encrypted 7z files. Send the password through a separate communication channel. Sending both together gives anyone who obtains that message everything needed to open the files.
How to use VeraCrypt for a private working folder
A VeraCrypt container is a file that holds an encrypted virtual drive. After entering the password, you mount that drive in Windows and work with its files in File Explorer. When you finish, you unmount it to close access through the unlocked drive.
The steps below create a new file container. During creation, use a new filename: selecting an existing file would overwrite it rather than encrypt its contents. Stay with the file container option instead of selecting an existing partition or system drive.
1. Create an encrypted file container
Install VeraCrypt from the official VeraCrypt download page and start the application. Installation requires administrator approval, so check with your administrator if you use a managed computer.
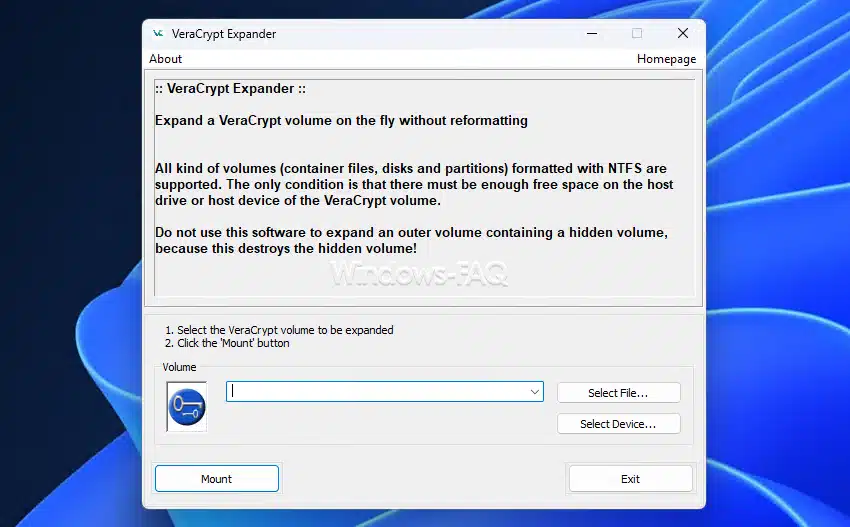
- Click Create Volume.
- Select Create an encrypted file container, then click Next.
- Choose Standard VeraCrypt volume.
- Click Select File and enter a new container filename, such as
Private.hc. - For a straightforward setup, keep AES and the default hash setting.
- Choose a size with enough room for your documents and future additions, such as 5 GB for a small collection.
- Enter and confirm a strong, unique password.
- Choose a file system for the virtual drive. NTFS is suitable for a Windows-only working container.
- Move your mouse within the wizard as requested to contribute randomness, then click Format.
In this workflow, Format initializes the new virtual drive inside your container file. It is not an instruction to format your existing Windows drive. Wait for creation to finish before closing the wizard.
2. Mount the container and copy your files
In the main VeraCrypt window, select an unused drive letter, such as V:. Click Select File, choose your container, and click Mount. Enter its password to make the virtual drive available in File Explorer.
Copy your documents onto the mounted drive and check that they open from that location. Save future changes directly to the files inside the drive. If you save a document to Desktop or Downloads instead, that copy is outside the container.
Leave password caching disabled if you want to enter the password again the next time you mount the volume. If a password is already cached, use Wipe Cache. Otherwise, VeraCrypt may be able to mount the container without asking again.
3. Unmount the drive when you finish
Save your work and close the applications using files on the encrypted drive. Select the volume in VeraCrypt and click Unmount. Older versions call this action Dismount.
Closing File Explorer or exiting the VeraCrypt window does not unmount the volume. Confirm that the drive has disappeared from File Explorer before leaving the computer or letting someone else use your session.
Your data is encrypted in the container as it is written, not only when you unmount it. Unmounting ends access through the unlocked virtual drive. While it is mounted, applications running with access to that drive can read the files.
4. Back up and synchronize the container carefully
For a straightforward file backup, unmount the container before copying it. Keep a separate copy on another storage device and occasionally check that the backup can be opened. Encryption protects confidentiality, but it does not repair corruption or recover a deleted container.
If you store the container in a synchronized cloud folder, do not edit it on two computers at the same time. Unmount it, let synchronization finish, and only then open the synchronized copy elsewhere. Treat sync conflicts as a risk of losing changes, not as something the encryption can resolve.
Check that your backup or sync tool detects changes inside the container. If it relies on modification dates, review VeraCrypt’s Preserve modification timestamp of file containers setting and verify the copied files after a test change.
Can you encrypt a folder without installing extra software?
Windows 11 Pro, Enterprise, and Education include Encrypting File System, usually called EFS. It encrypts files on an NTFS volume using a certificate and its associated private key. Windows 11 Home does not include this feature.
EFS does not create an independent folder password. Your authorized Windows account normally decrypts the files automatically while you are signed in, and file names remain visible. It is suitable for account-based file encryption, but not for a password prompt every time you open a folder.
Enable EFS on a test folder
Begin with a folder containing an unimportant document. Microsoft’s file and folder encryption instructions use the following Properties setting.
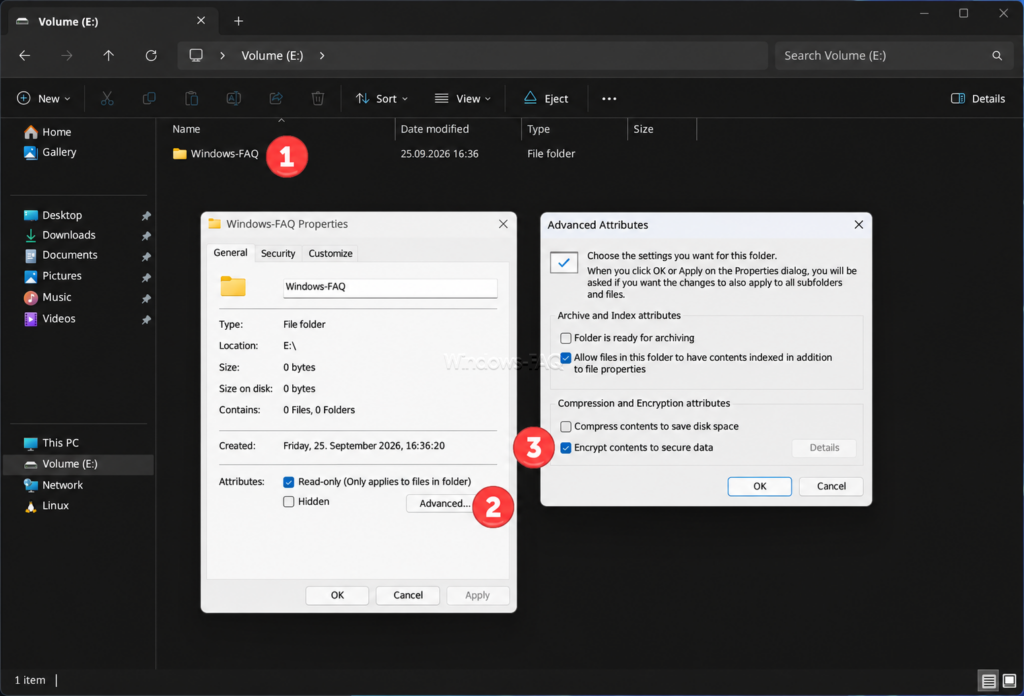
- Right-click the test folder and select Properties.
- On the General tab, click Advanced.
- Select Encrypt contents to secure data.
- Click OK, then Apply.
- Apply the change to the folder, subfolders, and files when prompted.
You should still be able to open the files from your own account without entering another password. That is how EFS is designed to work. Before encrypting important documents, back up the certificate and private key.
Back up the EFS certificate and private key
Use the Windows notification offering to back up your encryption key, or open the current user’s certificate manager. Press Windows + R, enter certmgr.msc, and open Personal > Certificates.
- Find the certificate whose intended purpose is Encrypting File System.
- Right-click it and choose All Tasks > Export.
- Select Yes, export the private key.
- Use the Personal Information Exchange format, normally a .pfx file.
- Protect the export with a strong password and complete the wizard.
- Store the PFX backup securely on separate storage that remains accessible if this PC fails, outside the affected Windows profile and separately from the encrypted files.
The export password protects the private key backup; it does not become a password for the folder. A certificate exported without its private key is not sufficient to decrypt the files. If the export option is unavailable on a managed device, ask your administrator about the recovery process before relying on EFS.
Reinstalling Windows and creating an account with the same name and password will not recreate the missing encryption key. You need the matching private key or a previously configured recovery mechanism. Keep this backup available before making changes to your Windows installation or user profile.
Why is Encrypt contents to secure data grayed out?
First check your Windows edition and the file system of the drive. EFS is unavailable on Windows 11 Home and cannot be used on FAT32 or exFAT volumes. NTFS compression and EFS encryption also cannot apply to the same file at the same time.
To check the file system, open This PC, right-click the drive, and select Properties. On a managed computer, organizational policy may also disable EFS. Do not reformat a drive just to make the option available; a 7-Zip archive may meet your needs without changing the drive.
EFS is also unsuitable as a general-purpose format for sending encrypted documents to other people. Copying a file to another file system or transferring it through an application can remove its EFS protection. Use an explicitly encrypted archive or container when you need a portable copy with its own password.
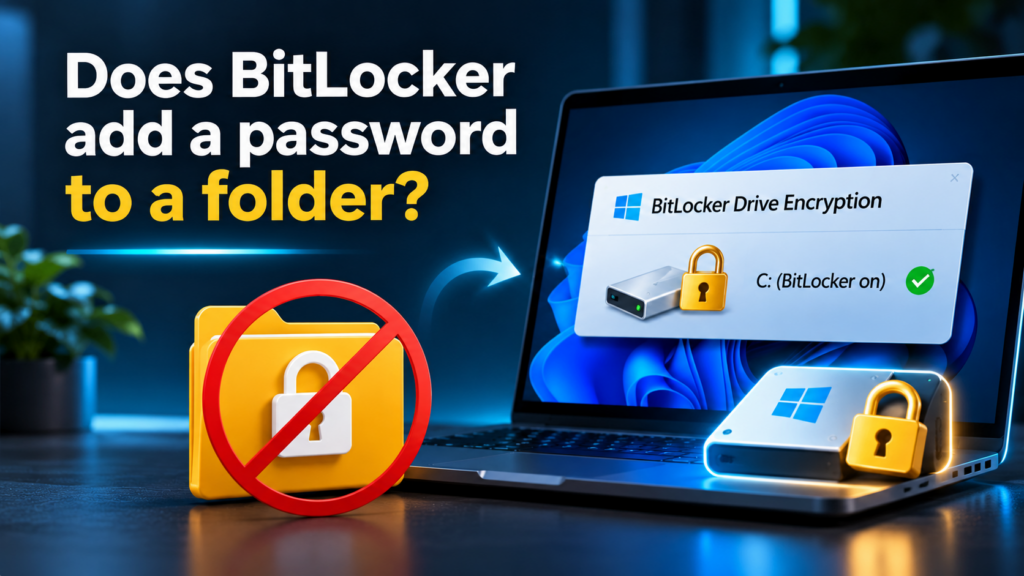
Does BitLocker add a password to a folder?
BitLocker encrypts a drive rather than adding a separate password to individual folders. It helps protect stored data when a computer or drive is lost, stolen, or accessed outside its normal Windows environment. Once the drive is unlocked, normal file access still depends on Windows permissions and the current session.
Full BitLocker management is available on Windows 11 Pro, Enterprise, and Education. Eligible Windows 11 Home devices can use Device Encryption. Keep the recovery key somewhere you can access even when the affected computer cannot start.
Drive encryption and a password-protected container can complement each other. The drive protects the wider storage environment, while the container gives selected documents a separate unlock step. Neither removes the need for backups.
Common folder protection mistakes to avoid
Confusing hidden folders, permissions, and encryption
Hiding a folder only changes whether File Explorer displays it. Windows permissions control which accounts can access it, while encryption protects the stored contents using a key. These are different features, and a hidden folder is easy to reveal.
Be cautious with folder-locking batch scripts that only rename or hide a directory. Their supposed password may even be stored as readable text in the script. Similarly, PowerShell’s Compress-Archive command creates a ZIP file but does not provide password encryption.
Leaving the unprotected originals behind
An encrypted archive does little for privacy if the original documents are still accessible beside it. After verifying the encrypted copy and its backup, deal with the original folder, extracted test files, and other working copies. Check the Recycle Bin and any cloud versions or backups that may contain older unencrypted files.
Ordinary deletion is not guaranteed secure erasure. On an SSD, overwriting an individual file cannot reliably remove every earlier physical copy. For sensitive work, enable appropriate drive encryption early and avoid creating unnecessary unencrypted copies.
Leaving your Windows session or container unlocked
Give each person who shares the PC a separate Windows account, and set up Windows Hello to protect access to your session. Press Windows + L whenever you step away. Locking Windows does not, by itself, unmount a VeraCrypt container.
Review any automatic sign-in settings in Windows 11 before relying on account-based protection. Anyone who gains access to your authorized session can normally open your EFS-encrypted files without another prompt. A separate archive or container password helps only while the protected contents remain locked.
Applications can create temporary files, recovery copies, or recent-file records outside an encrypted container. Encryption also does not prevent malware from reading files that are already unlocked. Keep Windows and your encryption tools updated, and check Microsoft Defender protection if you use the built-in antivirus.
FAQ: Password protecting folders in Windows 11
Can I password protect a folder on my desktop?
Yes, by putting its contents in an encrypted archive or container. The desktop location does not change how the encryption works. If OneDrive backs up your Desktop folder, check for older unprotected copies and remember that the original folder is not automatically encrypted.
Can I password protect a folder in Windows 11 Home?
Yes, 7-Zip and VeraCrypt can provide a separate password on Windows 11 Home. EFS is unavailable in Home, but upgrading to Pro is unnecessary if an encrypted archive or container suits your workflow.
Can I encrypt files without compressing them?
Yes, select Store as the compression level when creating a 7z archive, while keeping AES-256 and Encrypt file names enabled. A VeraCrypt container also lets you store and edit encrypted files without compressing them into an archive.
Can I keep an encrypted folder on a USB drive?
Yes, an encrypted archive or container can be stored on a USB drive. The destination computer needs compatible software, the password, and any required permissions. VeraCrypt may need administrator installation, so do not assume it will run on every borrowed PC.
Also check the USB drive’s file system before copying a large archive or container. FAT32 cannot store a single file of 4 GiB or larger. This limit applies to the outer container or archive file even if the individual documents inside are small.
How do I change the password?
For a 7z archive, create a new encrypted archive with the new password and verify it before replacing the old one. VeraCrypt provides Change Volume Password. Existing backup copies retain their previous password unless you handle those copies separately.
What happens if I forget the password?
An independently encrypted 7z archive or VeraCrypt container has no ordinary account-style password reset. Changing your Microsoft account password will not unlock it. Check your password manager and backups; without the password or another valid recovery route, access may be permanently lost.
Does encryption prevent someone from deleting my files?
No, encryption protects confidentiality, not the existence of the file. Someone with sufficient permissions can still delete or damage an encrypted archive or container. Keep separate, tested backups to protect against accidental deletion, corruption, and hardware failure.
A practical setup for everyday use
For documents you rarely change, create an encrypted 7z archive, verify it, and keep a separate backup. For a collection you edit regularly, use a VeraCrypt container and make unmounting it part of your routine. Choose EFS when account-based encryption meets your needs and you can manage the key backup reliably.
Before trusting any method with your only copy of a document, rehearse the full process with test files. Create the protected copy, close it, reopen it, and recover a file from the backup. That simple check confirms that your protection works in the way you expect and that you can still get your documents back.