Frequently Asked Questions

How to Clear Cache in Windows 11: A Step-by-Step Guide
Share your love
To clear cache in Windows 11, open Settings > System > Storage > Temporary files, review the categories and select Remove files. This removes selected temporary files, while browser, DNS and Microsoft Store caches each require their own cleanup method.
A full drive, a website showing old content and a Microsoft Store that will not open can all send you looking for a way to clear the Windows cache. They are different problems, so the right fix depends on what has stopped working. This guide starts with everyday cleanup and then explains the more specific repairs, using tools already included with Windows.
Which Windows cache should you clear?
Windows does not have one central cache that controls everything. It keeps different kinds of reusable data, such as file previews, downloaded update files and recently resolved website addresses, so clearing one cache will not automatically fix problems with another.
| Problem or goal | Cache or data involved | Where to start |
|---|---|---|
| Your system drive is running out of space | Temporary files and cleanup categories | Settings > System > Storage |
| A website displays old images or an outdated layout | Browser cache | The browser’s browsing-data settings |
| A domain resolves incorrectly after an address change | DNS resolver cache | ipconfig /flushdns |
| Microsoft Store will not open properly | Microsoft Store cache | wsreset.exe |
| Image or video previews are incorrect | Thumbnail cache | Disk Cleanup > Thumbnails |
| Windows Update repeatedly fails | Update downloads or the update data store | Windows Update troubleshooter, then a specific cache repair |
| Working shortcuts have blank icons | Icon cache | Rebuild the icon cache after closing Explorer |
| A local device has a stale IPv4-to-MAC mapping | ARP cache | Inspect with arp -a before clearing entries |
Use the section that matches your symptoms and check the result before moving on. If the issue is fixed, there is no benefit in continuing through every repair on the list.
This article is also available in German
You can also read the original German version of this guide on Windows-FAQ.de.
Diesen Artikel auf Deutsch lesen1. Clear temporary files in Windows 11
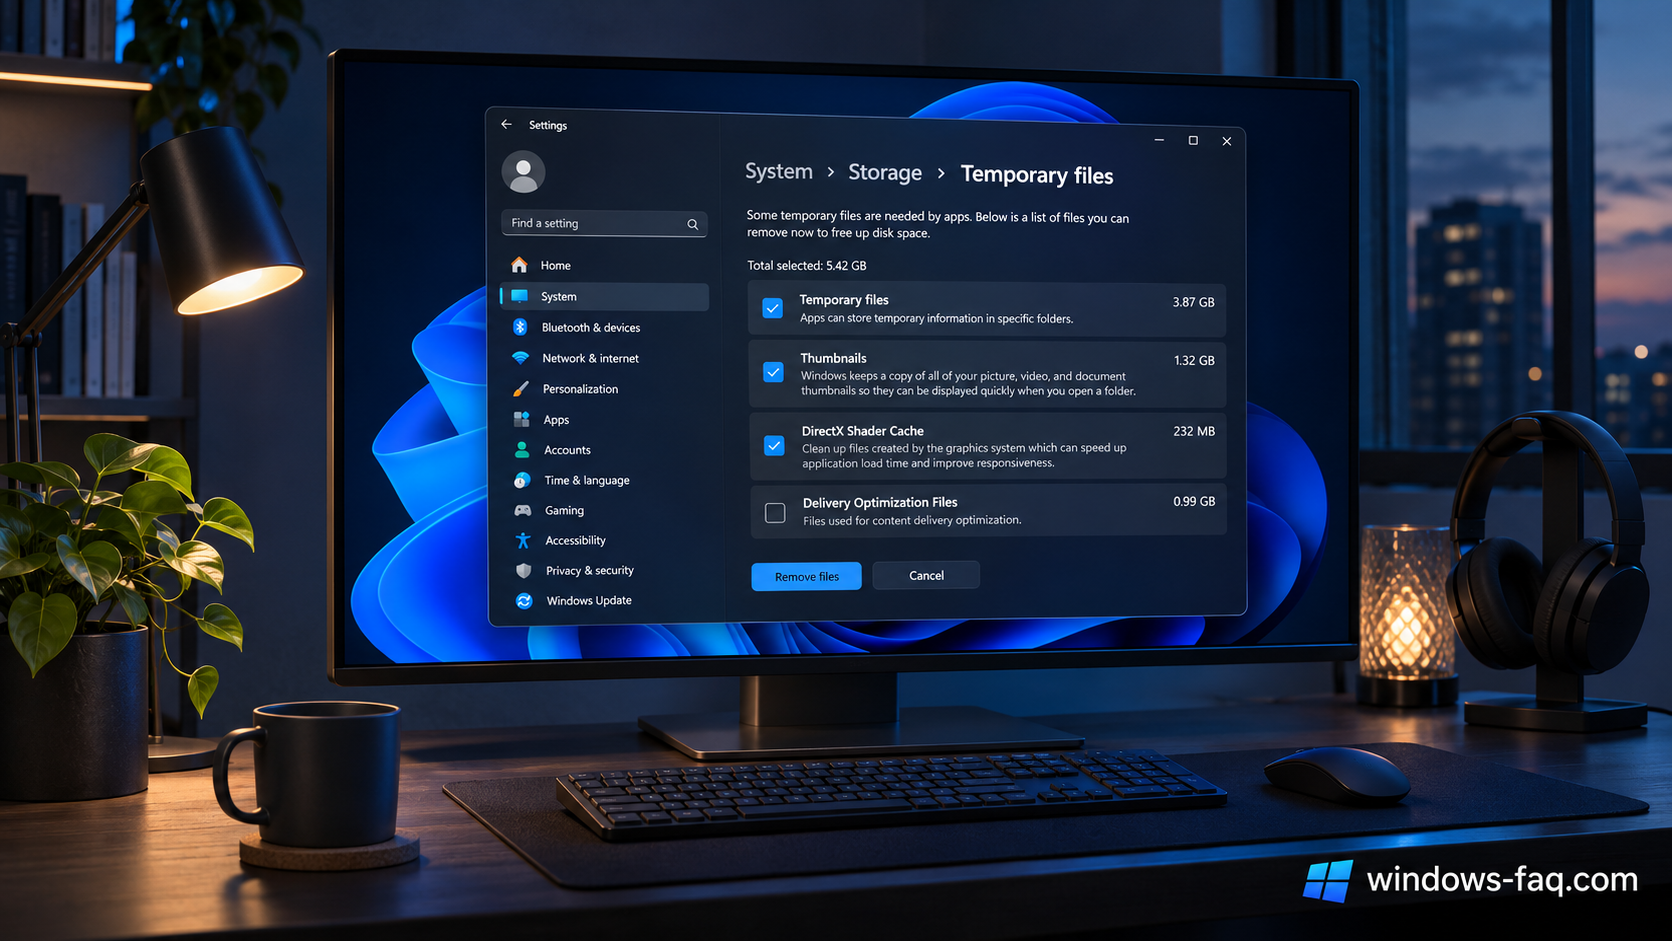
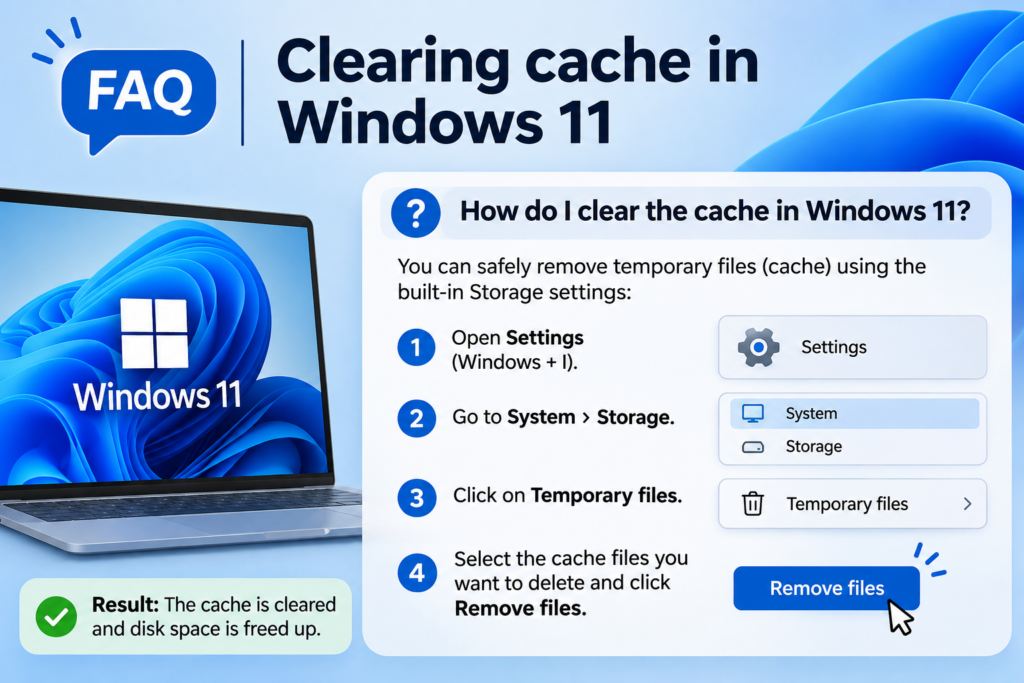
For routine storage cleanup, start with the Temporary files page in Settings. It shows separate categories and lets you review what Windows is offering to remove.
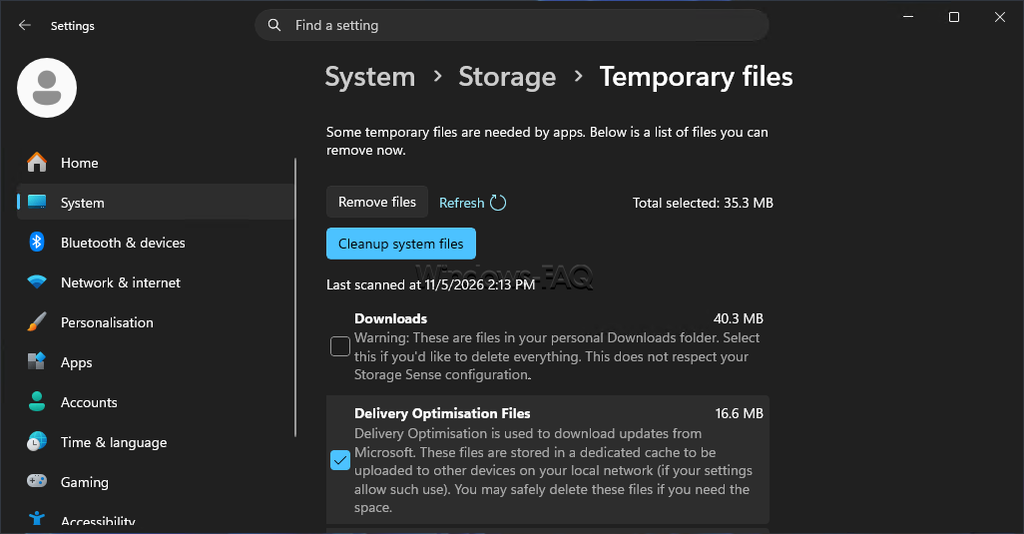
- Press Windows + I to open Settings.
- Select System, then Storage.
- Open Temporary files and wait for the scan to finish.
- Review the descriptions and select only the categories you want to remove.
- Select Remove files and confirm if prompted.
Windows 10 also provides temporary-file cleanup under Settings > System > Storage. The arrangement of the page can differ, but the same rule applies: review the selection before confirming it.
Which cleanup categories need extra care?
The cleanup list can include more than disposable cache files. Pay particular attention to the following categories if they appear:
- Downloads: These are files you saved yourself, potentially including documents and installers you still need.
- Recycle Bin: Emptying it removes your normal option to restore those deleted files.
- Previous Windows installation(s): Removing this deletes the files needed to return to the previous Windows version through the built-in rollback option.
Leave these categories unselected unless you have checked their contents and understand the effect. If your Downloads folder is difficult to review, our guide to finding files by date in Windows can help you locate recent items, although a file’s age alone does not make it safe to delete.
Delete leftover files from the Temp folder
You can also inspect your account’s temporary folder directly. Save your work, close applications and wait for any installations to finish before doing this.
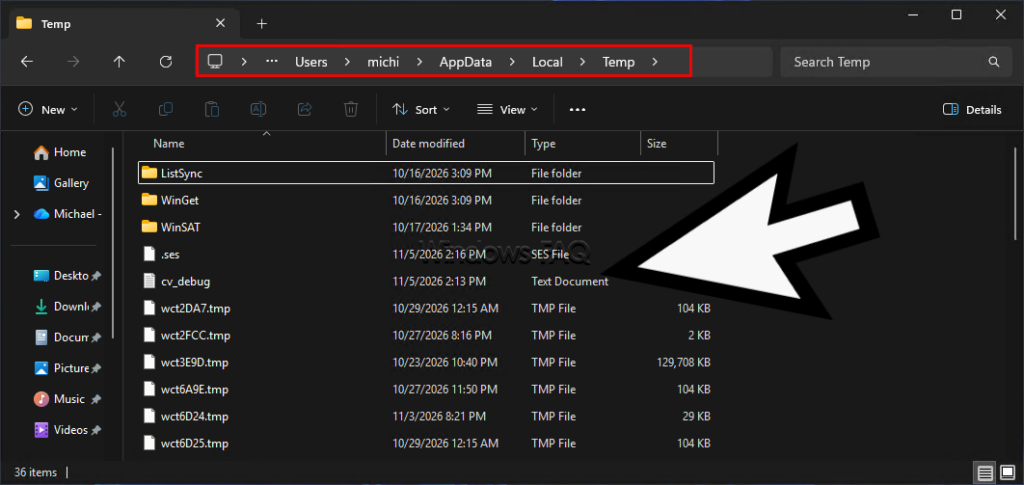
- Press Windows + R, enter
%temp%and press Enter. - Select the contents you want to remove, or press Ctrl + A to select all items in this temporary folder.
- Press Delete and skip anything Windows reports as currently in use.
Keep the Temp folder itself and leave locked files alone. If deleted items go to the Recycle Bin, they will continue to occupy disk space until you empty it, so review the bin before taking that final step.
2. Let Storage Sense handle recurring cleanup
Storage Sense can remove unneeded temporary files automatically, reducing the need to repeat manual cleanup. It is intended for storage management on your Windows system drive, usually C:.
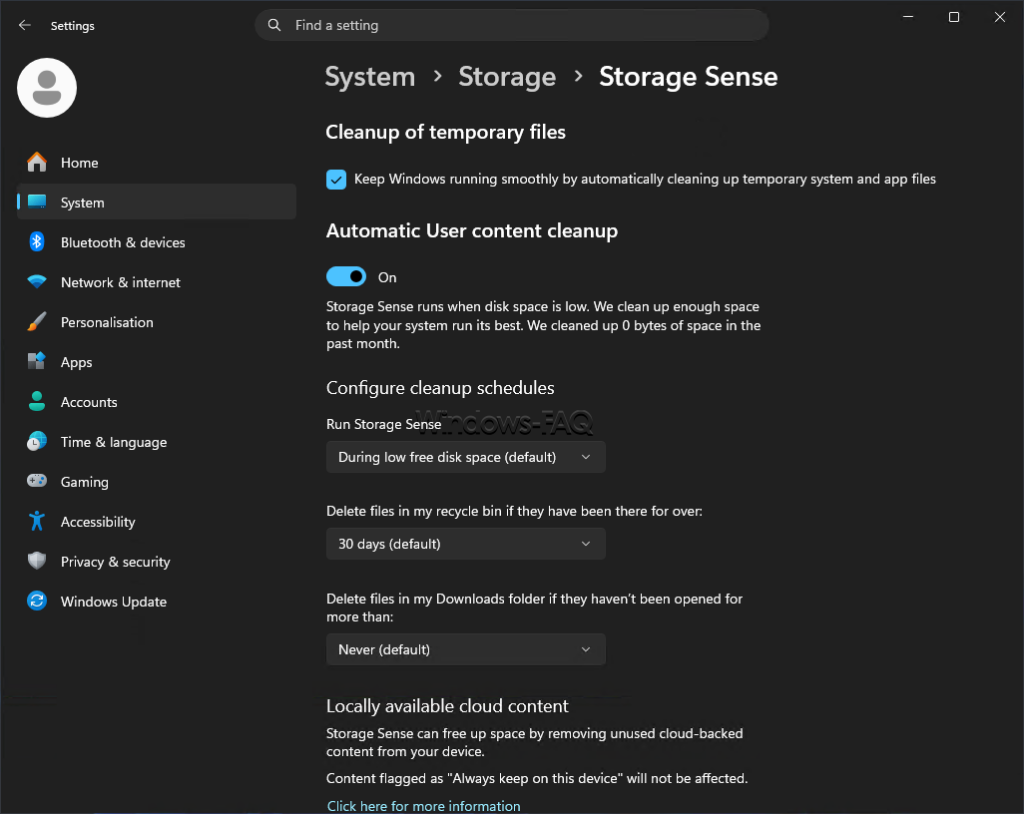
- Open Settings > System > Storage.
- Select Storage Sense and enable automatic cleanup.
- Choose when it should run.
- Review the options for the Recycle Bin, Downloads and locally available cloud files.
- Select Run Storage Sense now if you want to start a cleanup immediately.
For a cautious setup, keep automatic deletion from Downloads set to Never until you have decided on a policy that suits you. Also review cloud-file settings, because making a file online-only can free local space while requiring an internet connection to open it again.
3. Clear the browser cache in Edge, Chrome or Firefox
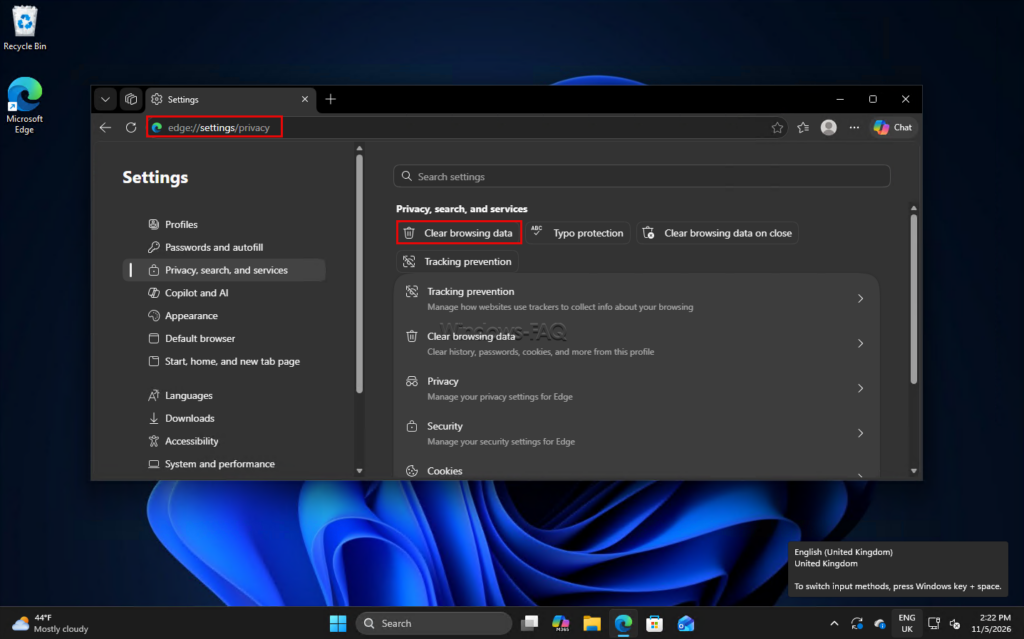
If a website displays old content or broken page elements, clearing that browser’s cache is a more relevant step than deleting Windows temporary files. Cached web content, cookies, browsing history and saved passwords are separate types of data.
Microsoft Edge
- Open Settings > Privacy, search, and services.
- Find Clear browsing data and select Choose what to clear.
- Choose a time range and select Cached images and files.
- Clear other selections you want to keep, then select Clear now.
Google Chrome
- Open the three-dot menu and select Delete browsing data.
- Choose the time range you want to clear.
- Select Cached images and files and review the other selections.
- Select Delete data.
Mozilla Firefox
- Open Settings > Privacy & Security.
- Find the browsing-data section and open Clear browsing data or Clear Data, depending on your version.
- Choose the time range and select Temporary cached files and pages.
- Leave other categories unchecked if you only want to clear the cache, then select Clear.
For a complete browser-cache cleanup, choose All time or Everything where available. Leave cookies and password-related options unselected if you want to preserve that information; if you later decide to remove sign-in data, first make sure you can find your saved browser passwords or otherwise sign back in.
4. Flush the DNS cache with Command Prompt or PowerShell
The DNS cache stores recently resolved domain-name information. Clearing it can help when Windows keeps using an outdated answer or a cached lookup failure, but it will not repair a disconnected network or change your DNS provider.
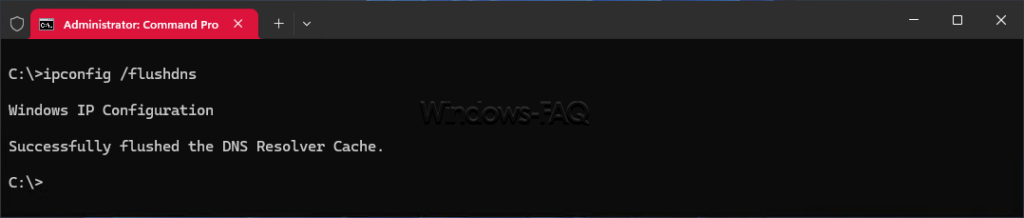
- Open Start and search for Command Prompt.
- Select Run as administrator and approve the prompt.
- Run the following command.
ipconfig /flushdnsWindows should confirm that it flushed the DNS resolver cache. If you need help opening the right window, follow our guide to running Command Prompt as administrator.
PowerShell provides an equivalent command. Run the following in an administrative PowerShell window instead of running both commands:
Clear-DnsClientCacheRetry the affected website or application afterward. Flushing Windows DNS does not erase your browser history, and an application or upstream DNS server may still have its own cached information.
5. Reset the Microsoft Store cache
If Microsoft Store will not launch correctly, try its built-in cache reset. The command operates on the Store cache rather than clearing every application’s data.
- Press Windows + R.
- Enter
wsreset.exeand press Enter. - Wait for the blank command window to close and Microsoft Store to open.
A blank window is expected, so give the process time to finish. If the problem remains, also check Windows updates and the PC’s date, time and region settings instead of repeatedly running the reset.
6. Clear the thumbnail cache with Disk Cleanup
Thumbnails are the small previews of pictures and videos shown in File Explorer. If previews are missing or no longer match the files, rebuilding this cache can be useful.
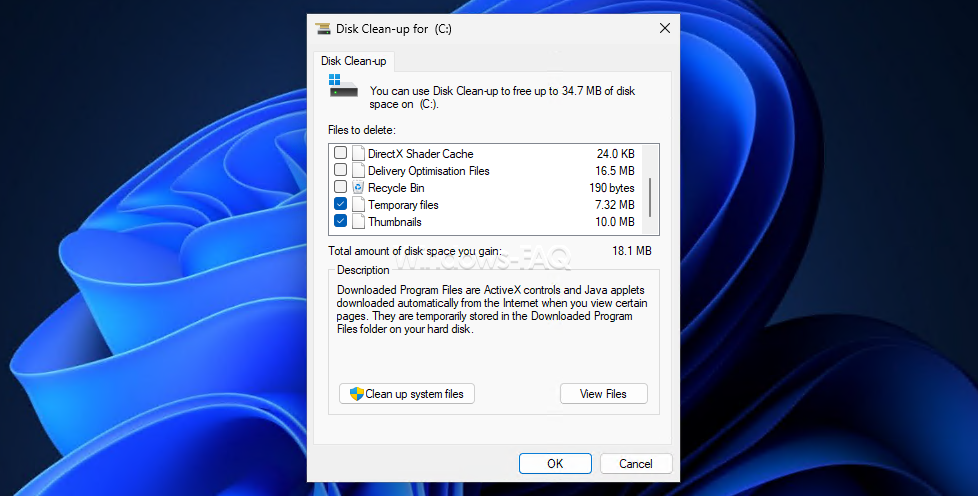
- Open Start, search for Disk Cleanup and launch it.
- Select the Windows drive if prompted.
- Select Thumbnails and clear other categories unless you also want to remove them.
- Select OK, then Delete Files.
- Open the affected folder again.
Windows generates new previews as you browse, so they may take a little longer to appear immediately afterward. This removes cached previews rather than the original photos or videos.
7. Reset the Windows Update cache when updates fail
Windows Update uses the SoftwareDistribution folder for downloaded files and its local data store. Resetting it can help with certain update failures, but it is a repair step rather than routine housekeeping.
Start with the Windows Update troubleshooter in Get Help, or open Settings > System > Troubleshoot > Other troubleshooters and run Windows Update where that option is available. Complete any pending restart before attempting a manual repair, and never interrupt an active installation.
Rename the update cache folder
Open an administrative Command Prompt and enter the following commands one at a time. Confirm that both services have stopped, or were already stopped, before entering the rename command:
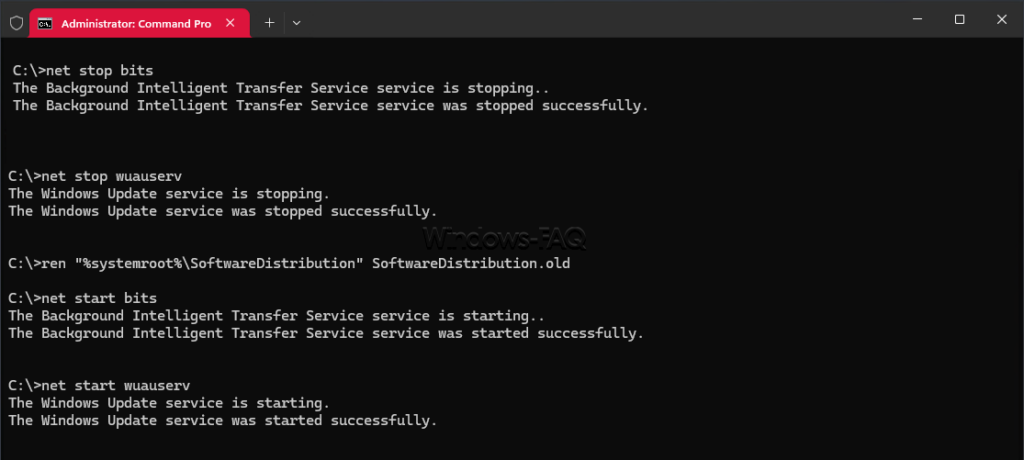
net stop bits
net stop wuauserv
ren "%systemroot%\SoftwareDistribution" SoftwareDistribution.old
net start bits
net start wuauserv
If SoftwareDistribution.old already exists, use a different unused backup name. If stopping a service or renaming the folder fails, stop that repair attempt and restart any services you stopped using the two net start commands above; do not force deletion or change folder permissions.
Restart Windows, open Windows Update and check again. Windows can recreate the working folder and download required files again; this does not uninstall updates already installed.
Renaming the folder does not free disk space because the old files remain in the backup folder. If your aim is storage cleanup, use the cleanup categories in Settings, and keep manual update repairs coordinated with IT on a work-managed PC.
8. Rebuild the icon cache for blank shortcuts
If a shortcut still opens its application but shows a blank icon, rebuilding the icon cache is a reasonable repair to try. Save your work and finish any file copies first, because you will temporarily close Windows Explorer.
- Press Ctrl + Shift + Esc to open Task Manager.
- Find Windows Explorer, right-click it and select End task.
- Keep Task Manager open and select Run new task.
- Enter
cmd.exeand leave the administrative-privileges option unchecked. Run this repair in the Windows account whose icons are affected. - Run the following command in that window.
del "%localappdata%\IconCache.db" /aIn Task Manager, select Run new task again, enter explorer.exe and press Enter. The desktop and taskbar should return; if Windows cannot find the cache file or the problem persists, restore Explorer anyway and investigate the specific icon problem instead of deleting additional folders.
9. Font cache problems: restart the service first
Windows caches font information to help applications display text efficiently. For certain Windows Search problems, Microsoft recommends restarting Windows Font Cache Service as a troubleshooting step.
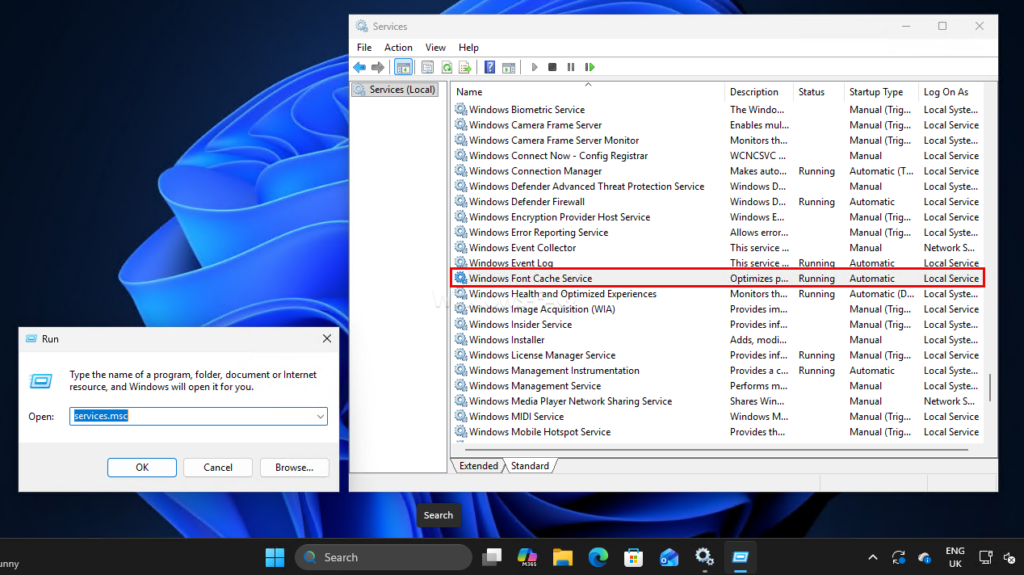
- Press Windows + R, enter
services.mscand press Enter. - Find Windows Font Cache Service.
- Right-click it and select Stop.
- Test the affected search feature, then return to Services and start the service again.
This restarts the service; it does not delete every font-cache file. Leave the service’s startup configuration unchanged and do not erase the contents of C:\Windows\ServiceProfiles\LocalService\AppData\Local, because that parent folder also contains unrelated data.
10. Clear the ARP cache for a specific local network problem
The ARP cache maps IPv4 addresses to physical network addresses on the local link. A stale mapping can occasionally matter after a device change, but this cache is not limited to private IP addresses and clearing it is not a general internet-speed improvement.
In Command Prompt, inspect the current entries first. Use this command to see the addresses Windows has recorded:
arp -aIf clearing the mappings is appropriate for the problem you are investigating, run the following in an administrative Command Prompt. Windows can learn dynamic mappings again as communication resumes:
arp -d *The wildcard requests deletion of ARP entries, so avoid using it casually on a machine with deliberately configured static mappings. ARP concerns IPv4; IPv6 uses a separate neighbor-discovery mechanism.
A practical approach: fix the symptom, then stop
Suppose websites open normally, but File Explorer shows old picture previews. Clearing the thumbnail cache addresses that symptom; resetting Windows Update or changing network settings adds work without addressing the same cause.
If the PC still feels slow after storage cleanup, look at what it is doing when the slowdown occurs. Task Manager can help you identify heavy CPU, memory or disk activity, while checking startup applications and available disk space gives you a better next step than repeating every cache reset.
FAQ: Clearing cache in Windows 11
Is it safe to clear cache in Windows 11?
Removing cache categories through the relevant Windows or browser tool is generally safe when you review what is selected. Downloads, the Recycle Bin and previous Windows installation files need extra care because they can contain personal files or recovery data.
Will clearing the cache make my PC faster?
It may help if a nearly full drive or damaged cached data is causing a problem. A healthy cache usually saves time, so deleting it can temporarily make websites, previews or applications slower while the data is rebuilt.
Does clearing cache delete saved passwords?
Clearing only cached images and files in a browser does not delete its saved passwords. Passwords and cookies are separate categories, and removing cookies can sign you out of websites even when the passwords themselves remain saved.
Is there one command to clear every Windows cache?
No single built-in command safely clears every Windows and application cache. Commands such as ipconfig /flushdns and wsreset.exe each have a specific purpose, so choose the one that matches the issue.
How often should I clear the Windows cache?
There is no need to clear every cache on a fixed schedule. Use Storage Sense for recurring temporary-file cleanup and reserve DNS, Store, icon or update-cache resets for a relevant problem.
Why do temporary files come back after deletion?
Windows and applications create new temporary files as they work. Their return is normal, although a folder that rapidly grows until the drive is full deserves investigation into the application or process creating those files.
Is clearing disk cache the same as clearing RAM?
No, removing cached files from an SSD or hard drive does not add physical memory. If memory pressure is the problem, inspect running applications and their memory use rather than treating disk cleanup as a RAM upgrade.
Can clearing cache remove a virus?
Cache cleanup is not a dependable malware-removal method. If you suspect an infection, check your security protection and run a scan; our guide to turning on Windows Defender explains how to check Microsoft’s built-in protection.
Where to start on your PC
For more free space, begin with Temporary files in Windows Settings and review your Storage Sense options. For a broken website, Store error or incorrect preview, use the matching section and test the result before changing anything else.
The useful question is which cache relates to the problem you can actually see. Answering that first keeps the cleanup focused and helps you avoid removing files or rebuilding data unnecessarily.